Wednesday, 12 October 2011

The Blocks are Down
Well, its not completely finished but tonight our cars are parked on the new drive.
This weekend I will start to fit the lights so that they can be wired up by the electrician.

Tomorrow Bob will finish of a few remaining items and then we will have a rest while the earth settles behind the walls, before work starts on the planter - Right hand edge of this picture
Below is a picture taken the other way from the big tall wall to wards the entrance.


The corner piece is not quite finished and will look a little strange until the other surrounding brickwork is in place - To mirror the wall on the other side

 -   we will have a stepped wall - height 450mm running along the front  here is a picture of the existing wall at the front of the drive. 

Tuesday, 11 October 2011

Craft Paving


photo: B Craft
If you wondered why its called Craft paving then this is  the reason,
  • Great Brickwork
  • Perfectly laid blocks
  • Underneath a correctly prepared surface

Here you see a view of the blocks that were laid today - the edging black/grey bricks will be fitted tomorrow.
This picture shows where the new clean brick joins the old chalky driveway - we have some cleaning to do ..
However in terms of level and fit this for me is perfect.
the final picture below shows the view towards
the entrance of the drive


Monday, 10 October 2011

The Drive Preperation
Today  we comenced the final preperation of the drive - the first point was to bring the chalk base down to the right level such that the different base layers could be applied*
(*To keep in line with the existing drive I had asked Bob to include these three layers in the quote - so that the additional bit of driveway was of identical specification to that laid previously by Roefield driveways and we confirm that after 4-5 years the condition of the drive was excellent!

One small job I had to do was to cover the
mains water pipe - see picture with gravel now added above the pipe - approx 100mm of pea shingle,  so now were ready to commence the backfilling behind the walls.

Dry Lean Mix


Cement / ballast mix


This picture shows the" before" picture behind the main wall - the after picture will be in a couple of days.
Now that the last remaining chalk was dug out for the drive, Bob started to lay the different layers Above  you see the drylene mix being compacted
The next layer I had asked for was then applied
Ballast dry mixed with Cement- with fabric on top of the first layer mirroring the construction of the original drive.
Liam stating the process of compacting the sand
While all this was in process the Brick pavers arrived if things go well tomorrow we might even mange to lay a few bricks of the new drive.

So by the end of Monday we have an initila layer of sand - work continues tomorrow.

Saturday, 8 October 2011

Friday 7th October Rescued by E H SMITH
As I explained yesterday this morning I set off to E H Smith at Bovingdon,
and explained my predicament to the guy there (I am sorry I never asked his name)
I took with me a sample of the existing brick (IBSTOCK SURREY MULTI)  - with holes - see below - and he had a look and selected this Terca brick for me and we went and found a sample and decided it was perfect.
I collected 50 of these bricks and spread them around the car and 30 minutes later was back home.
The Terca bricks are made by  Wienerberger
click the link and if you look around you will find the bricks.
they come from exactly the same part of the country so must use the same clay
Here is a picture taken Friday lunch time showing the new brick in Place - with no more holes.
It looks nuch better without the holes I am very happy with this result.
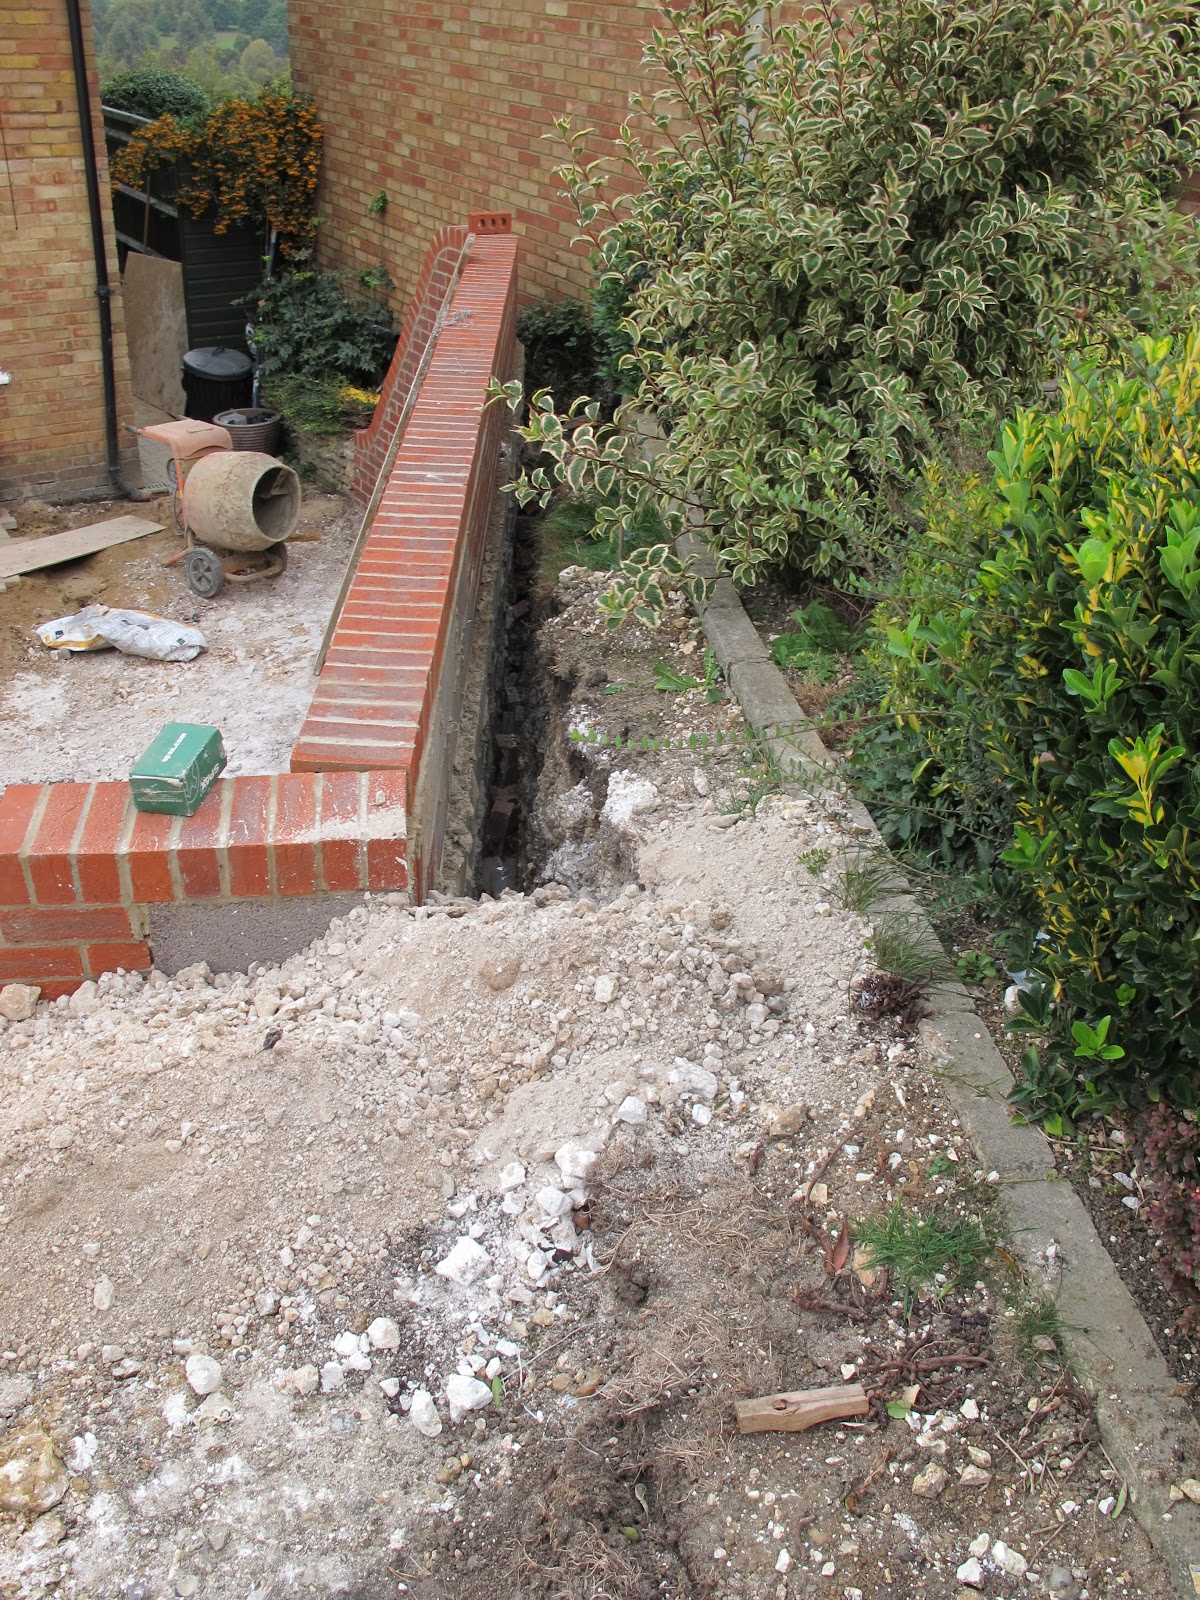
While I was away getting the bricks everyone else carried on building walls and Kevin finished off the big wall on the side;  here are a couple of pictures. One showing Kevin finishing off the wall and the last one for the week shows the situation as of Friday evening.
both walls 99% complete , Hopefully we will start to prepare the substructure for the block paving on Monday.
its time for the weekend - a great job done by everyone this week.
So here we are both walls done  - whats left to do
  • Spread the drylene
  • Spread the sand
  • lay the bricks
  • check soil is compacted
  • lay foundations front wall & Planter
  • Build front walls (we may delay this)
  • Build planter
I have to fit the 9 lights and then get Richard the electrician to come and connect it all up to the sensor.
Final  word of the week - Special thanks to Kevin the Bricklayer master craftsman!

Friday, 7 October 2011

Kevin The Master Brickie(Thursday)
Today we were lucky enough to be joined by Kevin the master Brickie.
The pictures below show how the day went.
Bob worked on the front wall  while kevin(dark blue jumper) worked  on the side tall wall
This picture - taken at lunch time shows that in the course of the morning Kevin had grown the wall to 27 rows.
and this was now a double wall no more breeze block!
Bob worked on the front wall while kevin continued on the side now standing on the building trestles meanwhile Liam worked hard and kept every one supplied with mortar  I ocasionally supplied cups of tea.


By the end of the day we had really made great progress with Kevin now adding the finishing row of bricks seen laid up the wall above the lamp enclosure - it looks like this will be finished tomorrow.

The next picture shows one of my mistakes I forgot to get the finish bricks for the steps in the front wall, These wire cut bricks are excellent but are similar to engineering bricks because they have holes in the centre - I forgot this and did not mention it to Bob so I take the blame for this. The result - see below is not very pretty
I discussed this with Lizzie and we decided that we could either try and find a similar matching brick or failing that use dark grey engineering brick to finish it off.

I decided that it would be best to try and find a matching brick and on Friday morning I would explain to Bob and ask him to remove the end bricks and I would go to a mega builders merchents at Bovingdon (have a look at their site
E H SMITH
I remebered that they have a huge range of Bricks and very helpfull staff


Wednesday More Bricks and some Cables

Tuesday evening I contacted the electrician to confirm how the cable should be laid arounf the bricks, and on wednesday morning after dog walking i did some electrical labouring threading the cable behind the brickwork before the wall got too high if you click on the pictures below you will see the cables waiting to be conected to the lights , My job is to fit the lights so theey line up correctly in the wall and then the real electrician will come check that what have done is correct and then conect up the lights with the armoured cable.
By lunchtime we had 20 rows of brickworkwhich sounds a lot but as you will see
there will be lots more.
Below you have a shot of the front wall where we have the start of the 22nd row
More picture in my next post.
Its been a very busy week.. Tuesday
I must apolagise for the lack of updates this week something called work got in the way (i have to work to pay for everybody else.. :-)
So below is an update
So while i worked away for my employer
down below in the front Garden the first 8-10 rows of brickwork was being laid this shows where the new wall joins the old wall between our house and the one next door


Here you see the wall continuing towards the street with the spaces for the wall lights I will need to lay some cable around here later this week. The Breeze blocks which are reinforced into the Footings are tied into the brick wall with Stainless steel ties.
In case you are wondering the damp proof course is just to help keep the brickwork dry over night.


This is the view or the front wall showing some more of the cut outs for the wall lights I think that eventually we will have 5 lights at the fronnt and Four at the side.
Not bad progress for One day.


Monday, 3 October 2011

And then there were walls
Another week and no time was wasted today, the cement mixer started to whiz round at 8:00am and kept going most of the day.
The pictures speak for themselves.

Morning here are Bob and Liam
building the left hand wall


Before Lunchtime
here you see the
"before" shot of the front wall


Evening

These two pictures  shows both the
left hand and front side of the retaining wall

Now with the approximate position of the lights maked out with bricks - we decided I need to buy one more light...
On the right you see  the front wall rising we are now at 10 courses of brick nearly all the way round